How To: Make a Tradesperson Website
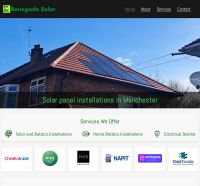
Renegade Solar (renegade-solar.co.uk) is a solar panel installer from Manchester. They had a Wix site but were finding it hard to tidily showcase all of the aspects of the business through the Wix editor, so the site was quite thin on content and wasn't attracting many visitors.
I built an easily-expanded "Eleventy" site which features three "collection" types:
- Accreditations: Display the various schemes and certifications the business has achieved - with logos, links through to verify the accreditation, and a brief description of why each one matters. These kind of pages help the business rank for terms like "MCS Certified Installer".
- Services: Displays main services offered by the business, like "Solar Panel Installs" or "Electrical Testing". Each service has an SVG icon, alongside a page of information giving reasons to choose this business.
- Locations: Allows the creation of pages about specific locations the business operates in, with local information, designed to attract visitors for search terms like "Solar Panel Installer Prestwich".
The site also includes a straightforward contact form with spam protection, powered by Formspark.
The complete source code for the Renegade Solar site is viewable here at git.chobble.com.
This page details some of the decisions I made when building the site, so I hope you find it it helpful if you're making a website for a tradesperson too.
Or, if you'd like me to build a similar site for your business, please contact me!
Base technology
The website is built with Eleventy (11ty.dev), a static site generator built with NodeJS (JavaScript). Eleventy is fast, has great defaults, and has some really handy plugins for things like image resizing.
Once built it's pushed to Bunny CDN (bunny.net) - a professional hosting platform that provides excellent performance, detailed traffic insights, and solid uptime. The SSD services offer super low latency, and features like edge scripting and country blocking give good control over the site.
Because I use NixOS, the development of the site happens in a nix develop shell powered by direnv (source code). This means I can work on the site on any of my machines, and it will behave the same everywhere because the tooling is exactly the same - Nix is awesome.
Accreditations Pages
I wanted to put the various trade standards or certifications that Renegade has achieved "front and centre", and so created an Eleventy collections for "accreditations". Each accreditation gets a full page on the site, and their logos are displayed prominently (with links through to their pages) all over the shop.
The benefit of giving each accreditation its own page is that it encourages Renegade to write a bit about each, and why it's important - rather than just having an image or a single word about that accreditation.
By having substantive content about each accreditation, the Renegade Solar site stands a good chance of ranking well on Google when people search for the names of those accreditations.
Services Pages
A very typical type of page for a service-based business, the "services" collection in Eleventy gives each page an icon and a full page of information about that service.
By breaking each service into its own page we have the potential to write some really in-depth information about each - an ongoing job for the team at Renegade, but one that should pay off handsomely in terms of attracting visitors from search results pages.
Location Pages
I added a "location" collection for pages targeting specific service areas. The team can add pages here to target those areas in search results, by providing valuable information specific to people from those areas looking for solar panel installers.
It's important here not to just copy/paste a load of text to each page and change "Whitefield" to "Prestwich" - instead, each page should be actually useful and unique. This requires some thinking about - my marketing guides and videos cover these pages in detail (and they're free for everyone!). As a website customer, Renegade also gets my personal support to help them understand and implement these strategies.
Contact Form
I discovered Formspark (formspark.io) while building this site and so used them for its contact page (source code). Formspark let you create custom contact forms which they deliver as emails - which is often the only bit of "dynamic" functionality needed on a website. Their pricing is great, too - you just buy the credits you need and they're used when people hit the forms - no monthly charges.
I originally embedded a Letterbird (letterbird.co) form, which is a nice free option, but the cost of Formspark is so low that I can include it for my website customers, no bother.
The form is spam protected using Botpoison (botpoison.com) - a great services with similarly fair pricing. Really easy to add to Formspark, too - but be sure to test your changes to make sure you've done it right!
Icons
I want to give a special shout out to the "Huge icons" pack on Iconify - link here. These are MIT-licensed and very consistent, with 4,151 icons covering all sorts of subjects, and I was able to find one for each spot on the Renegade site - and I wager you would for any other tradesperson site.
A common gripe with icon packs is that they don't cover everything so you end up with mismatched icons - but "Huge icons" is comprehensive enough to negate that!
Editing the site
The site's code is edited through Markdown, directly through the login for the web interface for Forgejo, my Git host. This is definitely easier than the Wix system, which is overloaded with a tonne of options that aren't needed for a normal "brochure" type website like this one.
After a quick phone run-through of how to edit files I left Renegade to replace some dummy content I'd added, and then once they were done I tidied those files up ready for production. Because we're both directly editing via Git, it was really easy for me to tell what had changed on each commit, and easy to roll back changes too.
Pushing to Bunny
Like most of my static websites, the Renegade site is hosted on Bunny, connected to a custom domain. I automate this deployment process through their API for reliable and efficient updates.
I automated this process using my "NixOS Site Builder" flake (source code). Every five minutes or so, this script clones the site from Git, checks for changes, and if there are any it builds the site using Nix into /var/www/example.com, then uploads the site to Bunny via their API.
You'll need to adjust this for your preferred build tool, unless you also want to use my NixOS setup, which would be awesome (please let me know if you do!).
Can you do this for me?
If you're a tradesperson and you want me to build a website for you, just like the one mentioned in this guide, please contact me to get the ball rolling.
My pricing is very transparent and at the end you'll have full access to the source code behind your site. You can host with me and get personal support to help you understand and implement the strategies in my marketing guides and videos (which are free for everyone!), like Renegade are doing, or host wherever you like - totally fine either way.